Sunday, July 27, 2014
On 4:18 PM by Unknown
Overview
Logic Supply's XBee prototyping cape makes it easy to prototype BeagleBone applications that communicate wirelessly using an XBee or equivalent wireless module. This tutorial will walk you through setting up a simple point-to-point connection to send data back and forth between two XBees.What You Will Need
- BeagleBone Black
- CBB-XBEE cape
- Two XBee modules - in this tutorial I will be using the XBee Pro Series 2
- One XBee USB Adapter
XBee Configuration
To configure the Series 2 XBees you will need to install Digi's XCTU program.To use the XBee USB adapter you will need to install the driver for the on-board FTDI USB-serial converter. FTDI provides both a Windows installer and a Mac OS X installer.
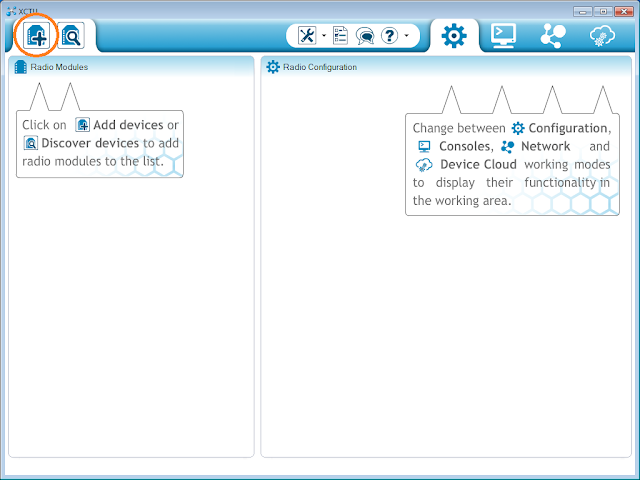
Now run XCTU and click the Add radio button:
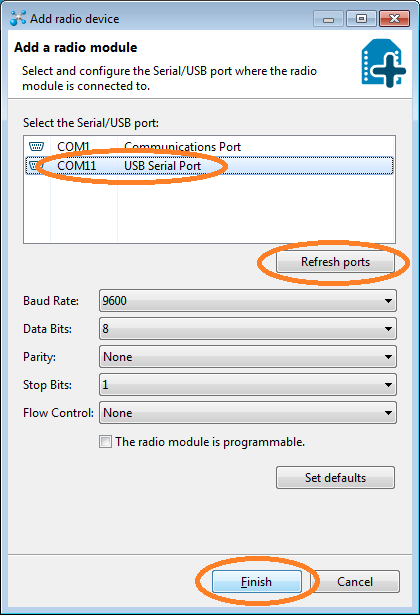
With the list of connected devices open, insert one of the XBees into the USB adapter, plug it into your computer and press the Refresh ports button. You should see a new COM port appear after connecting the XBee. Select the new device and press finish, leaving the rest of the settings as their default values:
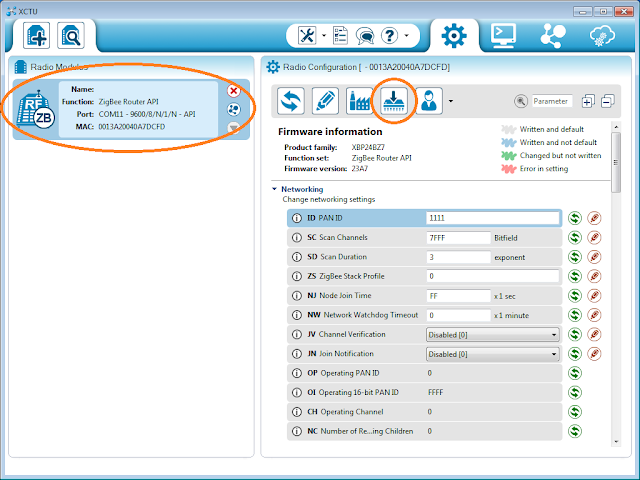
Click the XBee in the Radio Modules list, then click the Update Firmware button:
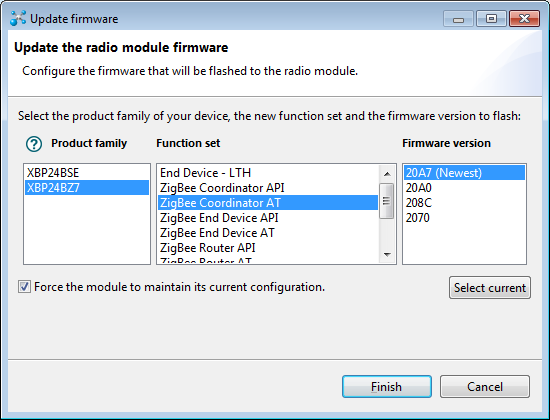
Select the latest ZigBee Coordinator AT firmware and press Finish:
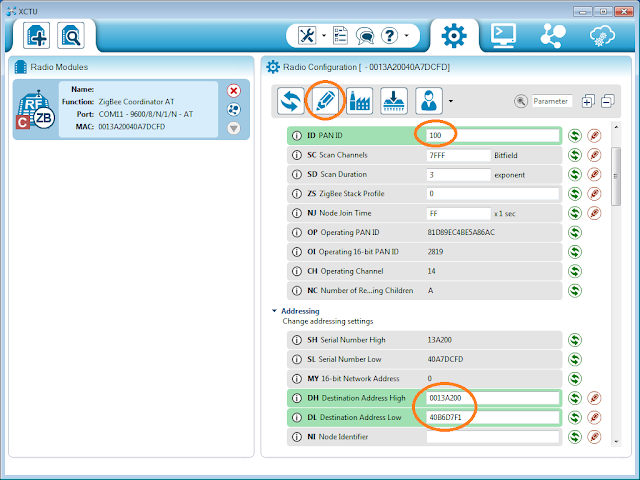
Once the firmware update has finished you'll have to set a few configuration values. The first is the PAN ID, which is a 64-bit user defined Personal Area Network ID. It can be anything you want that fits in 64 bits, you'll just need to make sure that all XBees you want on the same network are using the same PAN ID. I'll use 100 here. You'll also need the 64-bit address of your other XBee. This is split up into the high 32 bits (DH) and low 32 bits (DL) under the addressing section. The DH value is 0013A200 for all XBees, and the DL value is written on the sticker on the bottom of your XBee, on the next line after 0013A200. Once you've entered these three values, press the pencil icon to write the new configuration:
You're now ready to program the second XBee. Unplug the adapter board and remove the Coordinator XBee. You may want to mark the Coordinator with a piece of tape to make sure you don't mix them up. Insert the second XBee and plug in the USB cable. Follow the same steps as above, but instead of the Coordinator firmware, select the latest ZigBee Router AT firmware:

Configure the Router with the same PAN ID and DH value, but use the DL value that's written on the label of the Coordinator XBee. This way each of the two XBee modules knows the address of the other.
You can now close the XCTU software, leaving the Router XBee attached to your computer.
BeagleBone Setup
With your BeagleBone powered off, attach the XBee cape to the BeagleBone, then insert the Coordinator XBee module into the headers over the Ethernet jack. The antenna should be facing out, away from the center of the cape. Once everything is in place, boot your BeagleBone and connect via SSH.Before you can talk to the XBee you have to enable the UART2 module that it's connected to. This can be done from the command line using capemgr by executing:
root@beaglebone:~# echo BB-UART2 > /sys/devices/bone_capemgr.*/slotsYou should now see the UART2 tty special file:
root@beaglebone:~# ls /dev/ttyO2
/dev/ttyO2
Sending Data
You're now ready to start communicating between the two XBees. You can use any serial terminal software on your PC to connect to the Router. For this example I'll use CoolTerm, which is compatible with all the major operating systems. Once installed, run CoolTerm, click options and select the serial port that the Router XBee is connected to. If you can't remember which is the correct port you can use the Re-Scan Serial Ports button while plugging in the USB cable to see which port appears. Make sure the baud rate is set to 9600, with 8 data bits, no parity and 1 stop bit: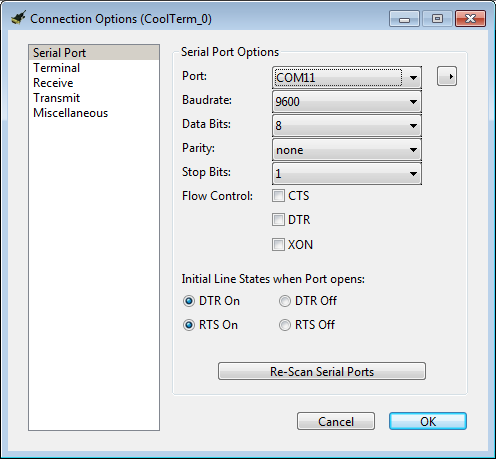
On the Receive options page, ensure that the Wait for termination string checkbox is unselected:
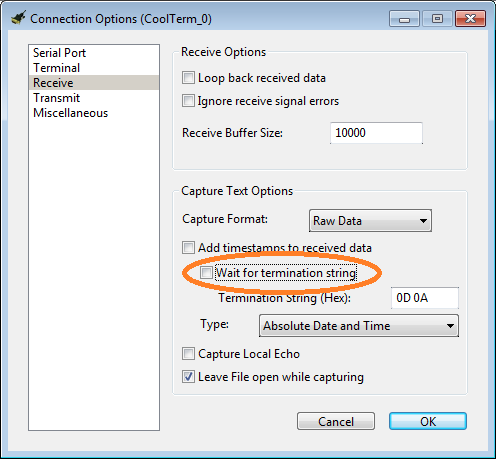
Press OK to save the settings, then click the Connect button. You shouldn't see any data appear yet.
Now back on the BeagleBone's command line, open a serial connection the the Coordinator XBee with the screen program (or use your favorite Linux serial terminal software):
root@beaglebone:~# screen /dev/ttyO2 9600You should now be able to type in either serial console and see the characters appear in the other!
To exit screen press ctrl+a k then y to confirm.
Stay tuned for more advanced BeagleBone + XBee tutorials and projects!